
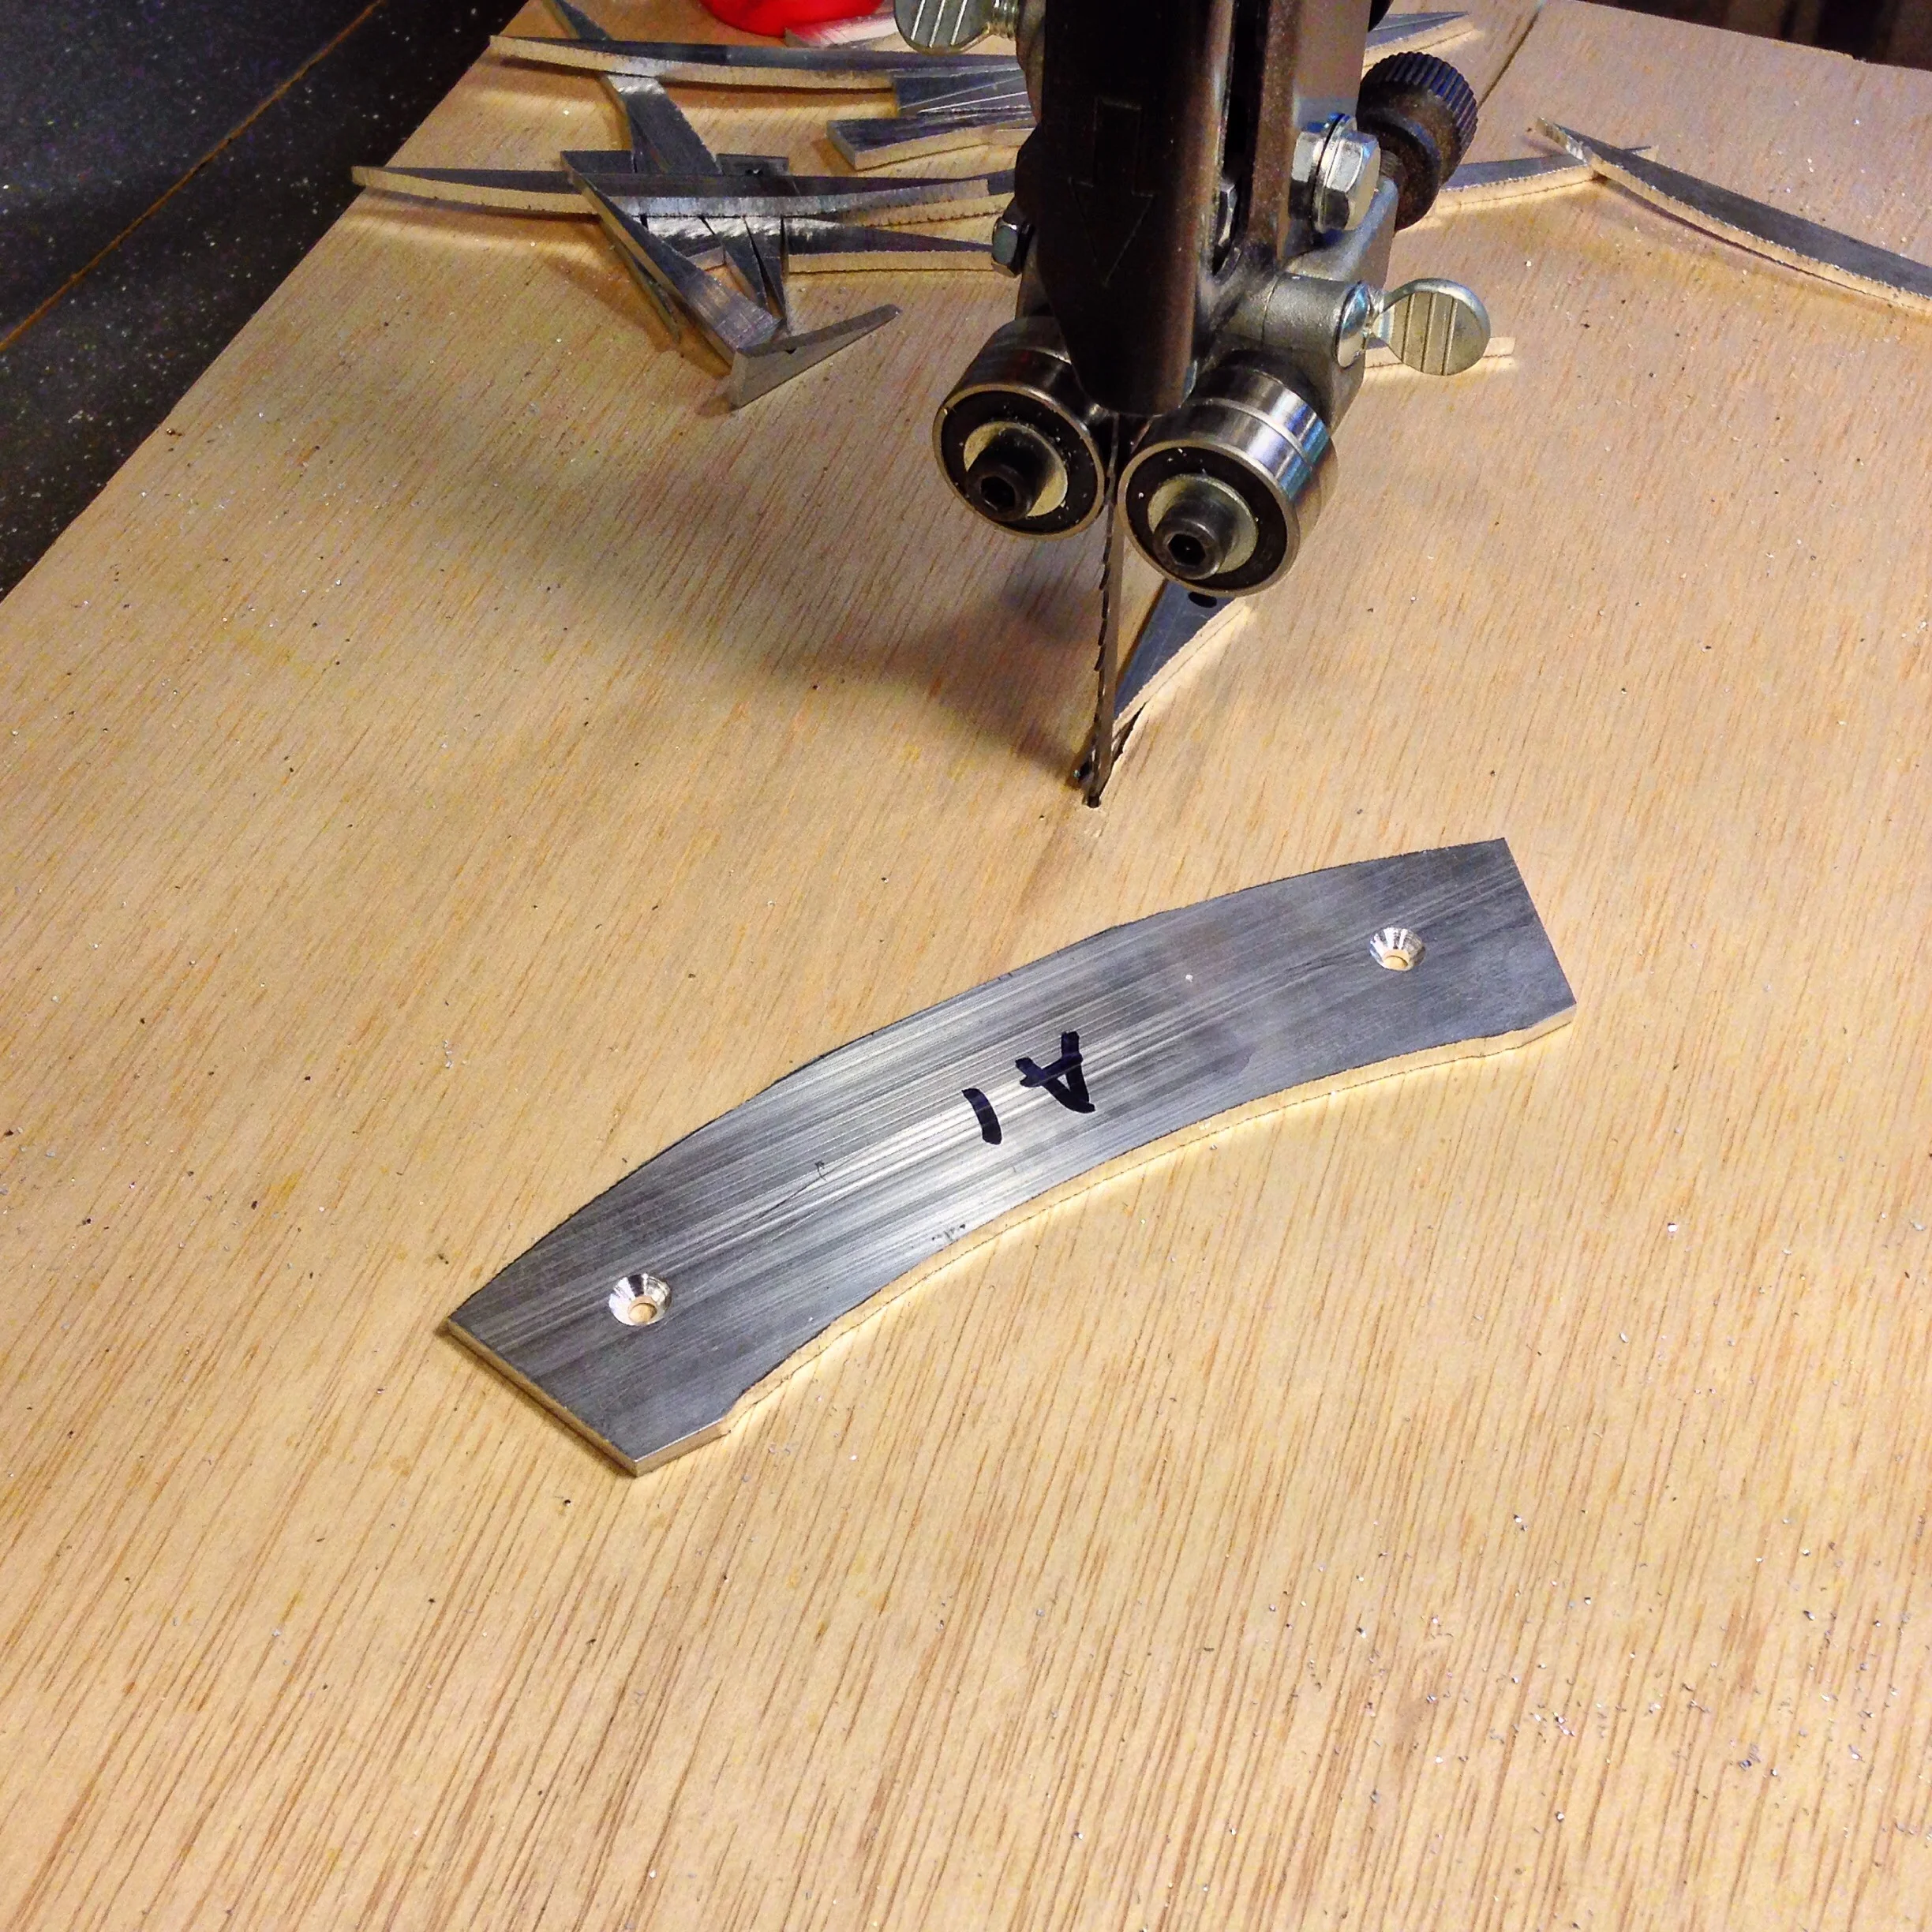
I've been working with the material for the decorative beads on the bottom edges of the aprons - aluminum. Here's one of the wedges after roughing out the inside and outside radii on the bandsaw (and drilled/countersunk for screws). While it makes a total mess, it's actually pretty fun to work with.
Back to Bases


The chest of drawers is coming along swimmingly. I have posted some images to illustrate how the base was made. Unfortunately there were media blackouts during the process, so images of some steps are missing. Many steps, actually. And there wasn't really a media blackout. I just forgot to take pictures. I find that I really have to think about photographing the process, or else I get completely immersed in the work and forget to stop and take pictures. Sometimes I also forget to stop and smell the roses.
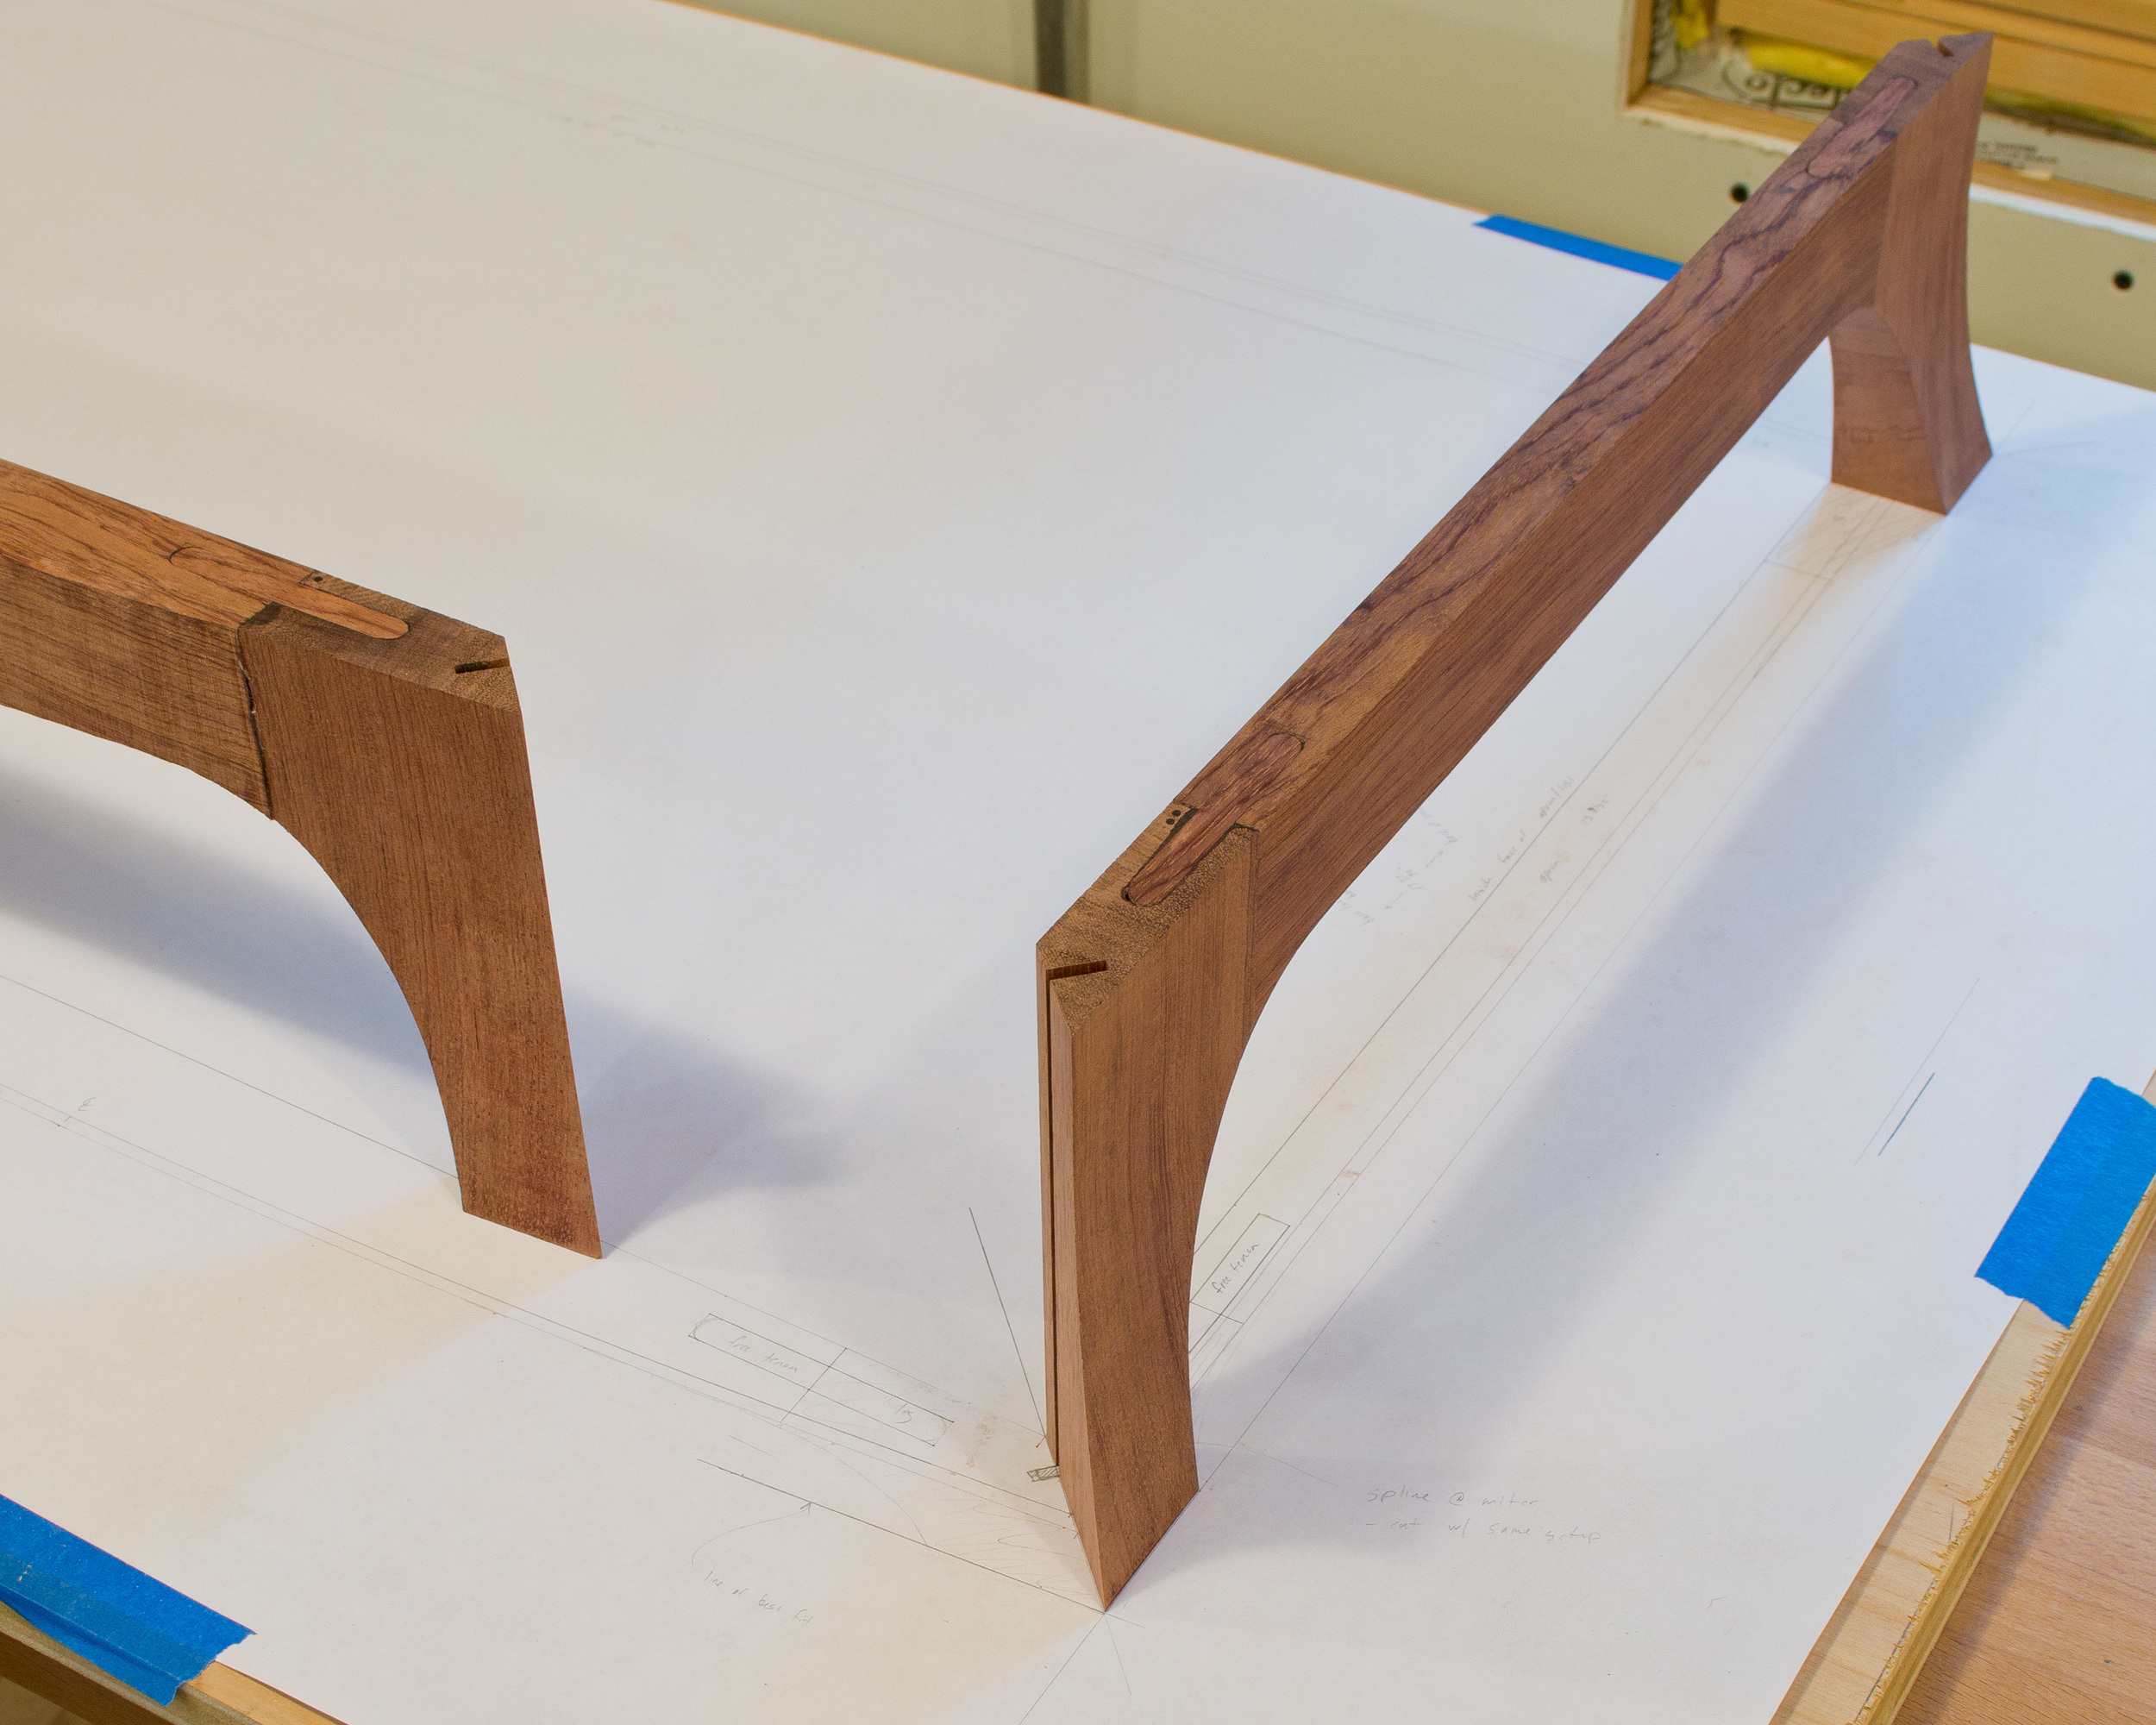
What I am able to show here is how making the base started with a full size drawing. At this point, any existing drawings are pretty much useless as I have to work off the reality of the piece. So I placed the case on a sheet of paper (from a discarded roll of plotter paper) and traced the outline. This gave me the footprint of the case, with no measuring, no transferring dimensions or angles. Pretty quick, simple, and accurate. From there, I drew the footprint of the base, including the joinery to connect the aprons to the legs (free tenons) and the joinery to reinforce the miters (splines). I could then use the drawing to determine the lengths of the aprons, location of mortises, etc.
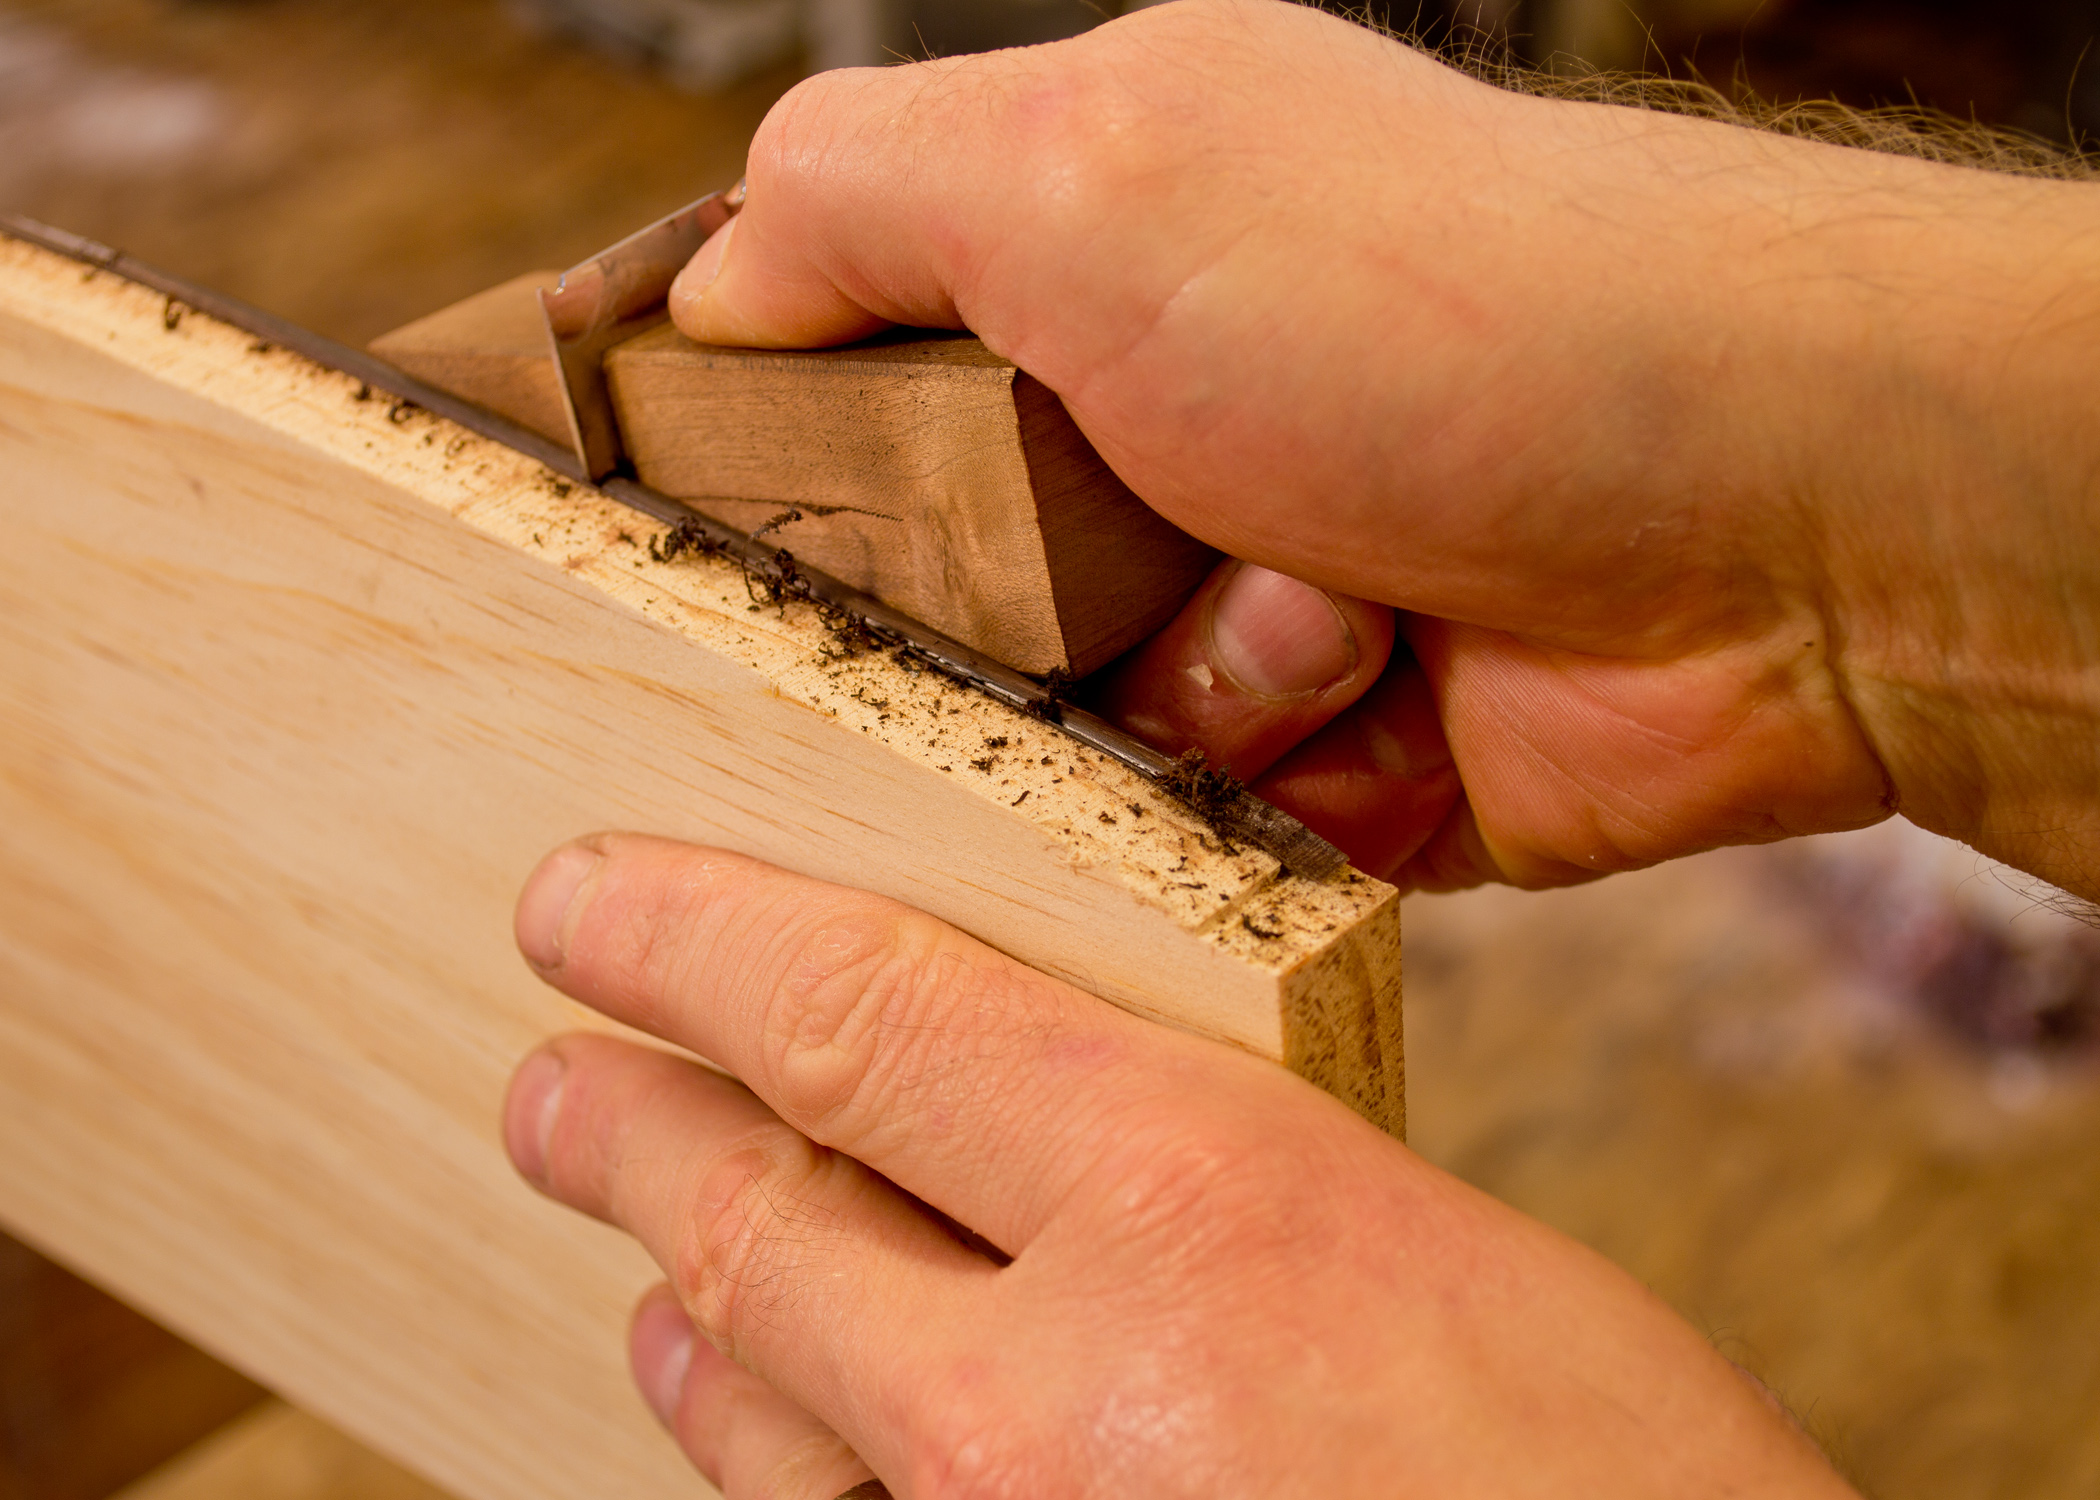
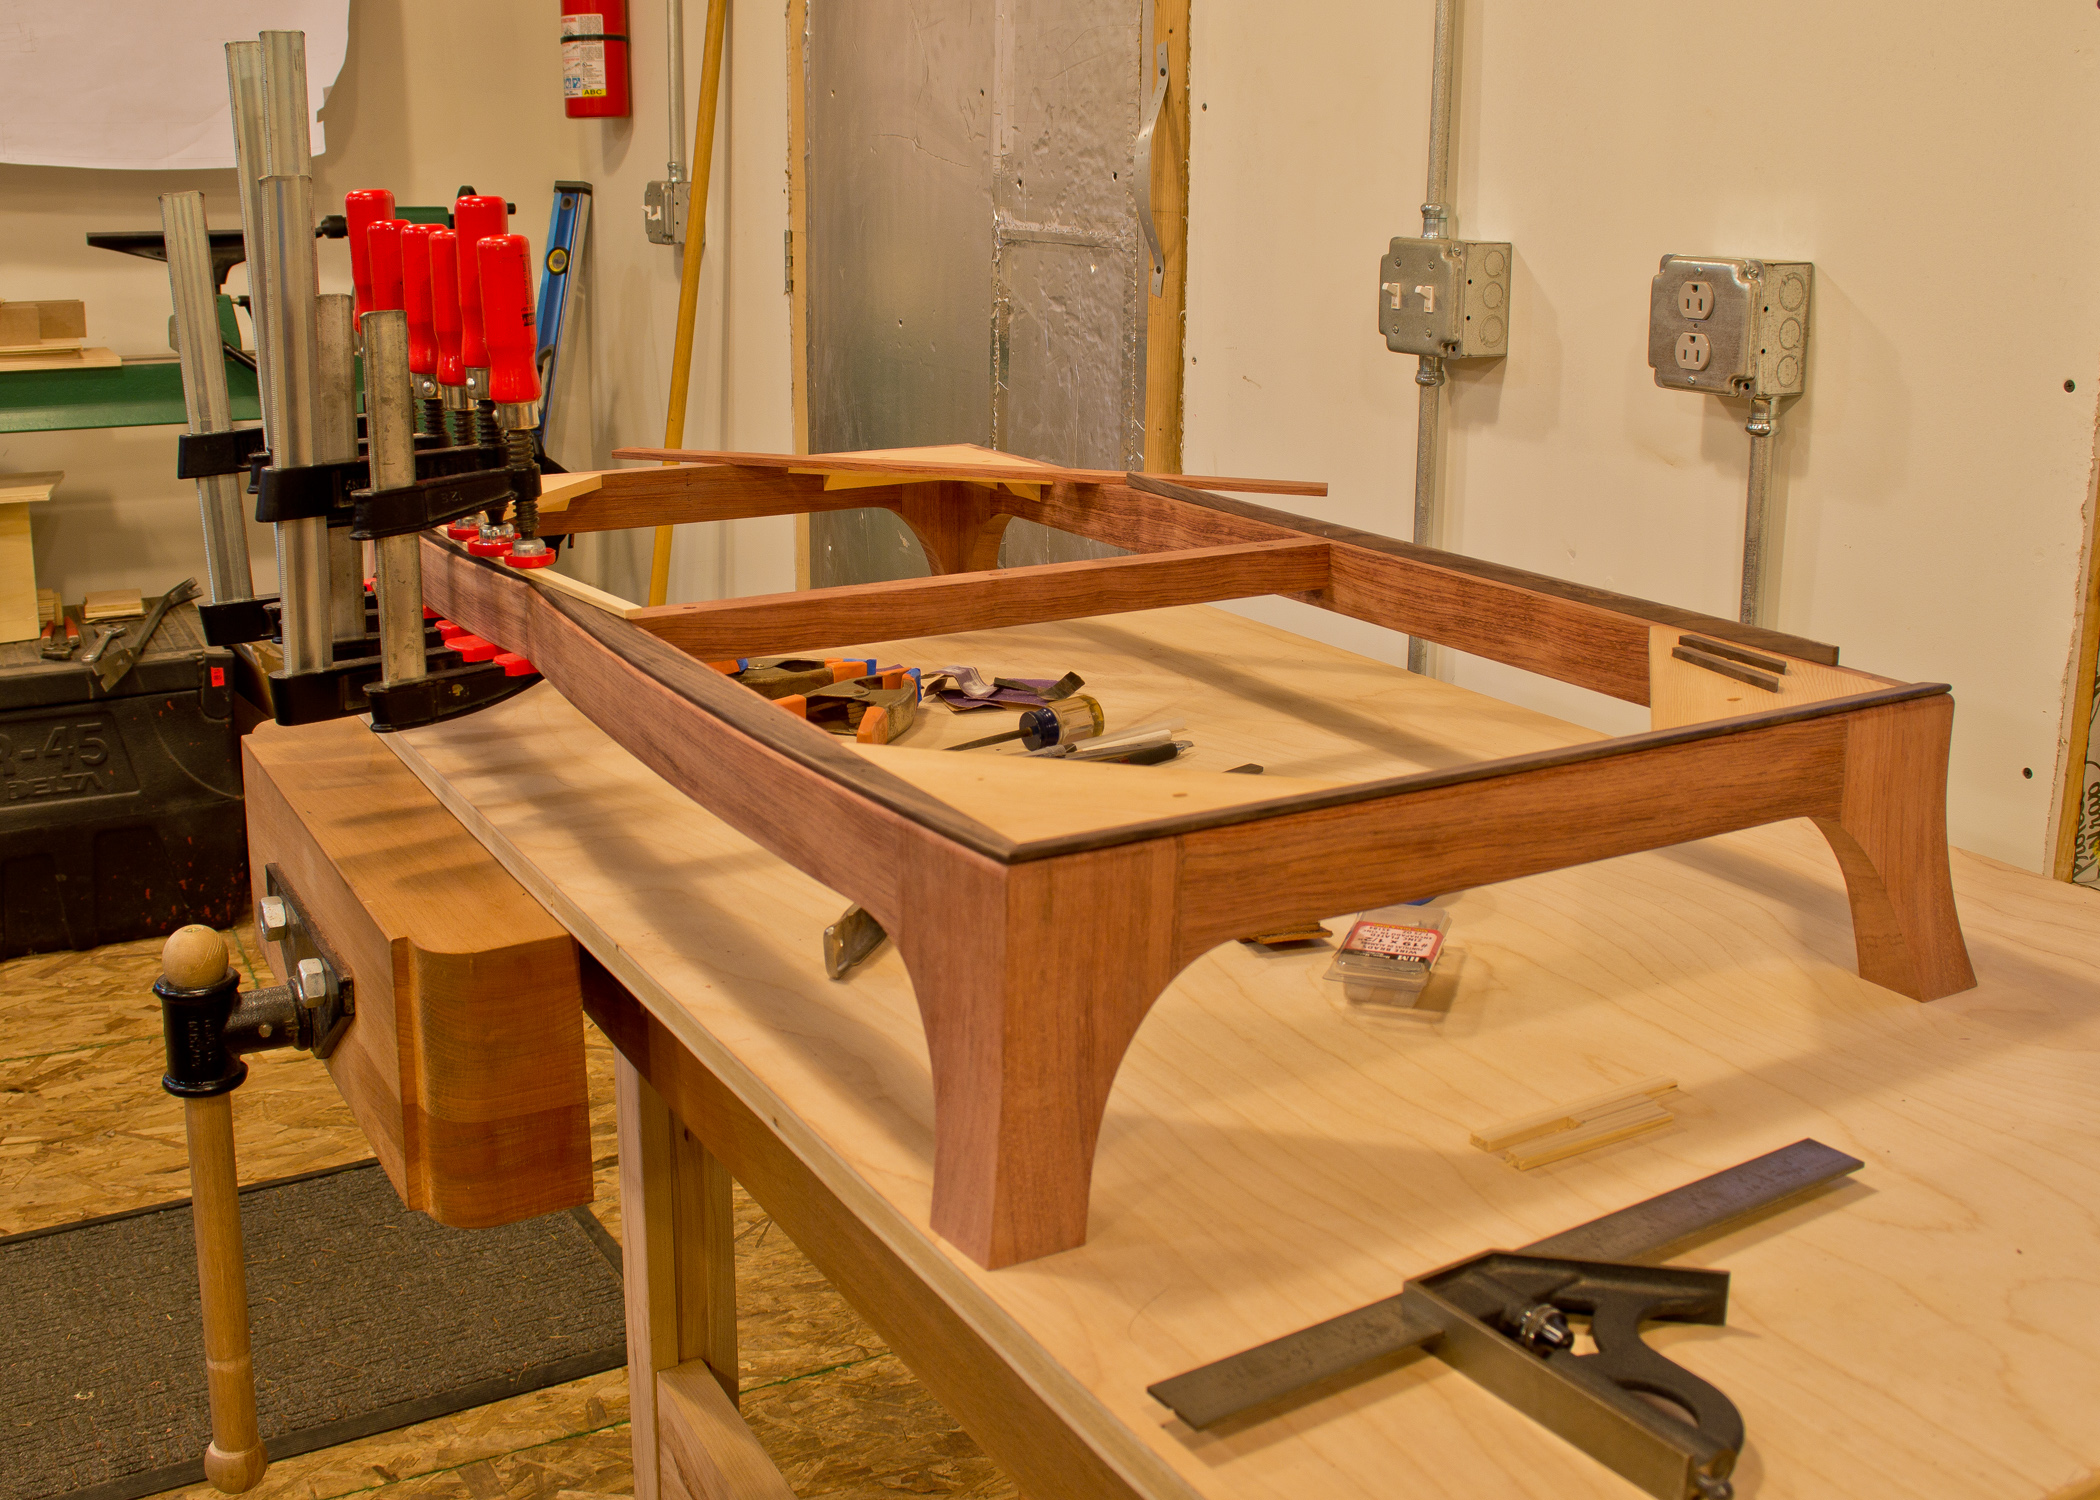
What I didn't provide photographic evidence of is the process of creating the bubinga base. In a nutshell, I did as much work to the legs and aprons as I could when they were still rectangular parts - milling to size, routing mortises, cutting miters, roughing out the flare in the legs. Then I glued together the leg-apron-leg sub-assemblies and cut the curves where legs meet aprons. Then it was a lot of shaping with rasps, files, and spokeshaves to fair the aprons into the legs. Then assembly of the the entire base (the splined miters), adding gussets and glue blocks, a bit more shaping of the legs to refine the miters, and shaping of the top edge of the base, where it transitions into the bead. From there, I think the photos can take over.